
Cooking Tips from Fellow Meathusiasts
A Quick Guide to Cooking Methods
-

Grilling
Grilling is one of our favorite ways to cook here at The Meatery! It combines easy clean up with a deliciously smoky flavor that elevates many cuts, whether beef, pork, or chicken.
Our Grilling Guide
- Prep the meat: defrost the meat, season it well, and get started right away, there's no need to wait for the meat to get to room temp.
- Fire up the grill: clean your grill grate. For charcoal grills, follow the directions for how much you'll need and how to build a charcoal fire. For gar grills, refer to your owner's manual and set the grill to medium.
- Grill the meat: Monitor your meat's temperature with an instant-read thermometer. Don't flip the steaks too much, one flip is usually enough. Avoid charring or burning the meat, and be ready to turn down the heat or move the meat to a cooler spot on the grill if needed.
- Remove and rest: the temperature will continue to rise for a few minutes after you remove the meat from the grill, so we recommend pulling it off when the internal temperature reads 5 degrees below your desired doneness. Rest the meat for about five minutes before serving to maximize flavor.
-
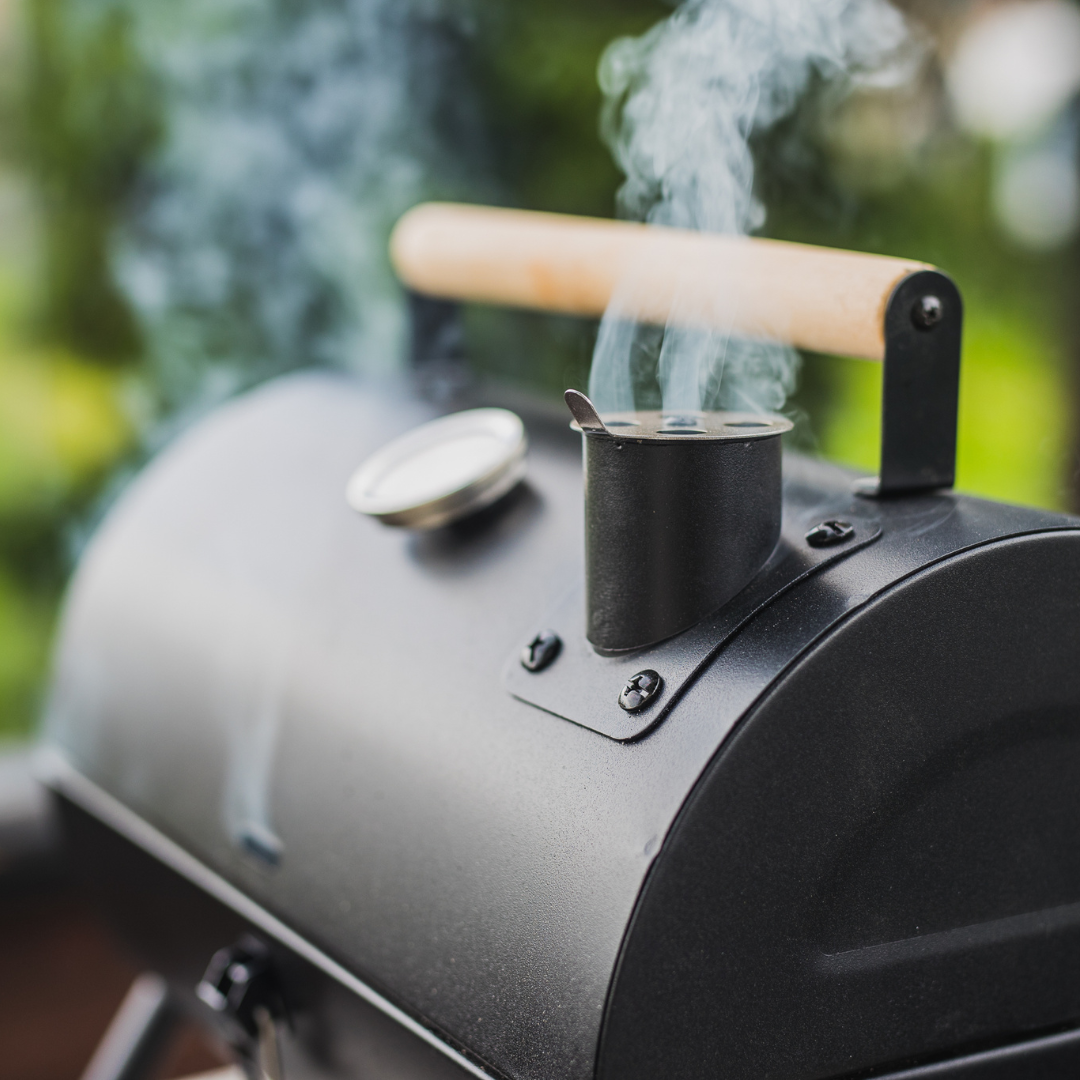
Smoking
Brisket, roasts, ribs, and other tougher cuts are great candidates for use on a smoker. Indirect heat, wood smoke, and time combine to break down the meat and add incredible smoky flavor.
Smoking Basics
- Prep the smoker: follow the instructions for your type of smoker, and if your smoker's heat source is directly beneath the meat, use a drip-pan to prevent flare-ups and avoid producing too much smoke. Always work in an open, well-ventilated space.
- Choose your wood: with smoking, the wood you choose to use make a difference in the ultimate result. Mesquite provides a deep, smoky flavor, while apple wood is mildly sweet, and hickory is a versatile choice. Follow the guidelines from your recipe, but wood choice is a great place to experiment.
- Season your meat: spice rubs and seasonings blend with the natural flavor of the wood. Work the rub into the surface of the meat to get the most flavor.
- Cook low & slow: Adding a touch of smoky flavor is possible in an hour or less, but some cuts will need much longer. Refer to your recipe for specific times and temperatures.
-
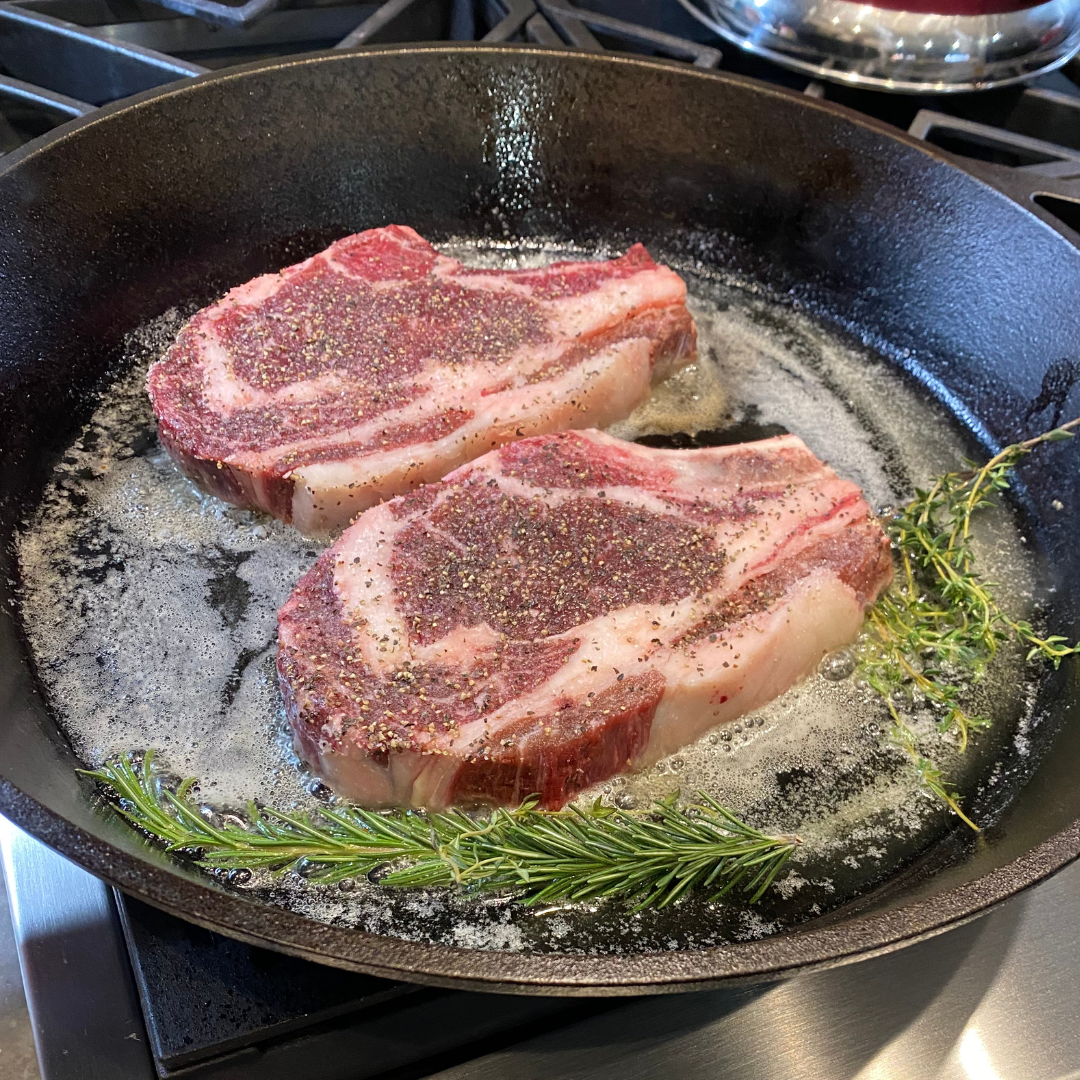
Skillet Cooking
Skillet cooking is a quick and easy way to brown ground beef or pork, or to sear steaks and chops. Large, heavy-bottomed skillets are one of the most important tools in our kitchen.
Skillet Basics
- Prep & preheat: Heat a large, heavy bottomed skillet over medium heat and remove meat from fridge. A large skillet ensures plenty of room for the meat to sear evenly.
- Crumble & brown: if you're cooking ground beef or pork, crumble the meat with a spoon or potato masher and stir lightly to ensure even cooking.
- Drain: most recipes call for fats to be drained after ground meats are browned.
- Add & enjoy: with ground beef or pork as your base, make delicious recipes!
Reverse Searing
Skillets work in tandem with oven roasting to finish delicious steaks with the reverse sear method. This method works best with thicker cuts.
- Prep and preheat the oven to 250 degrees F. Prep the meat with seasoning or rub.
- Bake the steak on a wire rack over a baking sheet until it reaches an internal temperature of 115 degrees F.
- Sear the steak: transfer the steak to a preheated oiled skillet and sear on each side.
-
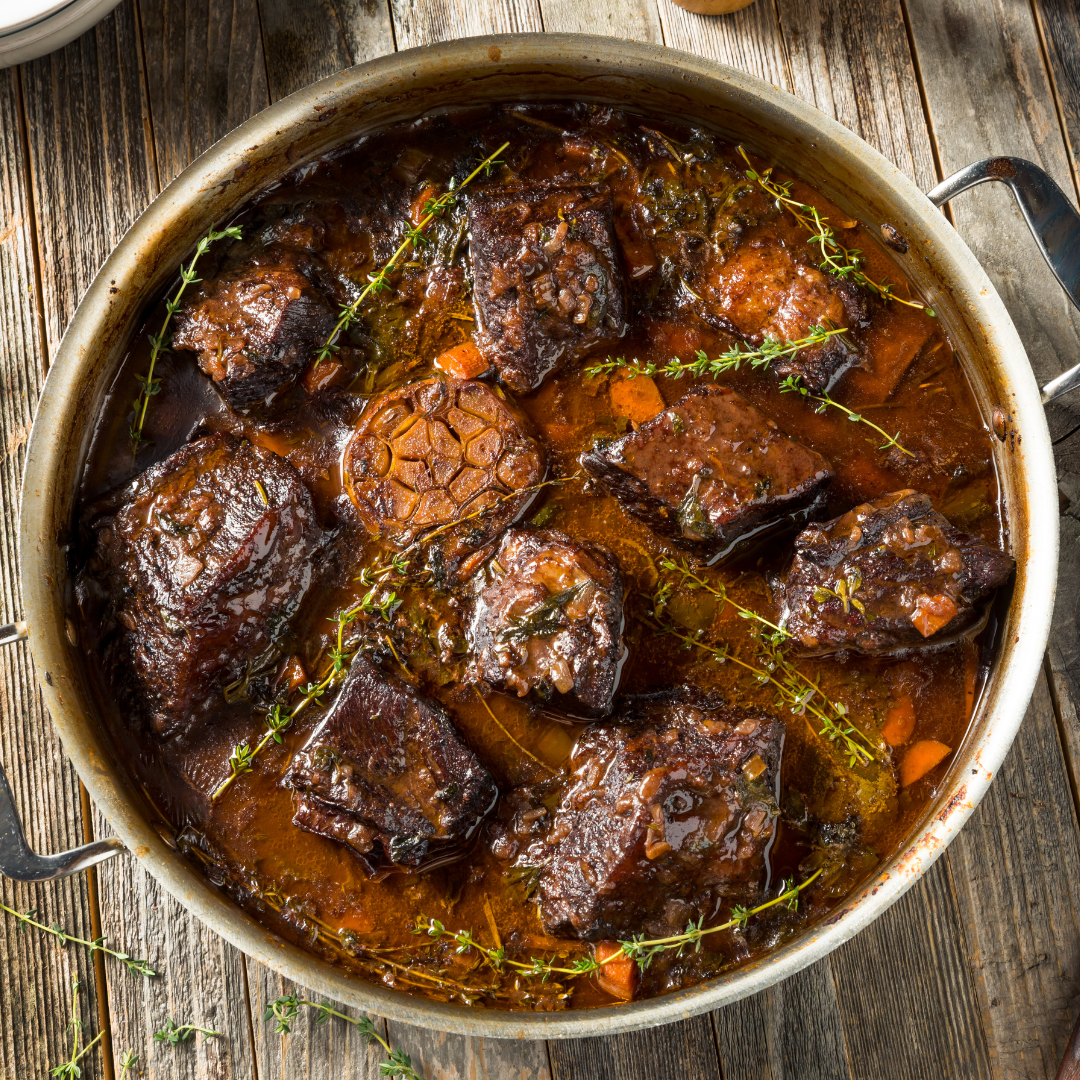
Braising
Braising is a great way to turn less-tender cuts in savory, fork-tender centerpieces. Cook meat in liquid over low heat for several hours for some beautifully braised meals.
Braising Basics
- Preheat & prep: you can braise on your stovetop, in a slow cooker, or in the oven. Pat your meat dry with paper towels to allow it to brown more evenly, then apply a spice rub or seasoning mix.
- Brown the meat: Using medium heat, brown the meat on all sides and remove it from the pan.
- Saute vegetables: many braising recipes include chopped vegetables. Add them to the pan and saute until they soften.
- Deglaze for flavor: the brown bits in the bottom of the pan add amazing flavor to a braised dish. While the pan is still hot, add liquid like beef or chicken broth, wine, or juices and scrape up the bits with a spoon or spatula.
- Combine everything: Return the meat and veggies to the pan, add more liquid, then lower the heat and cover with a lid. The dish is finished when the meat is fork tender.
-
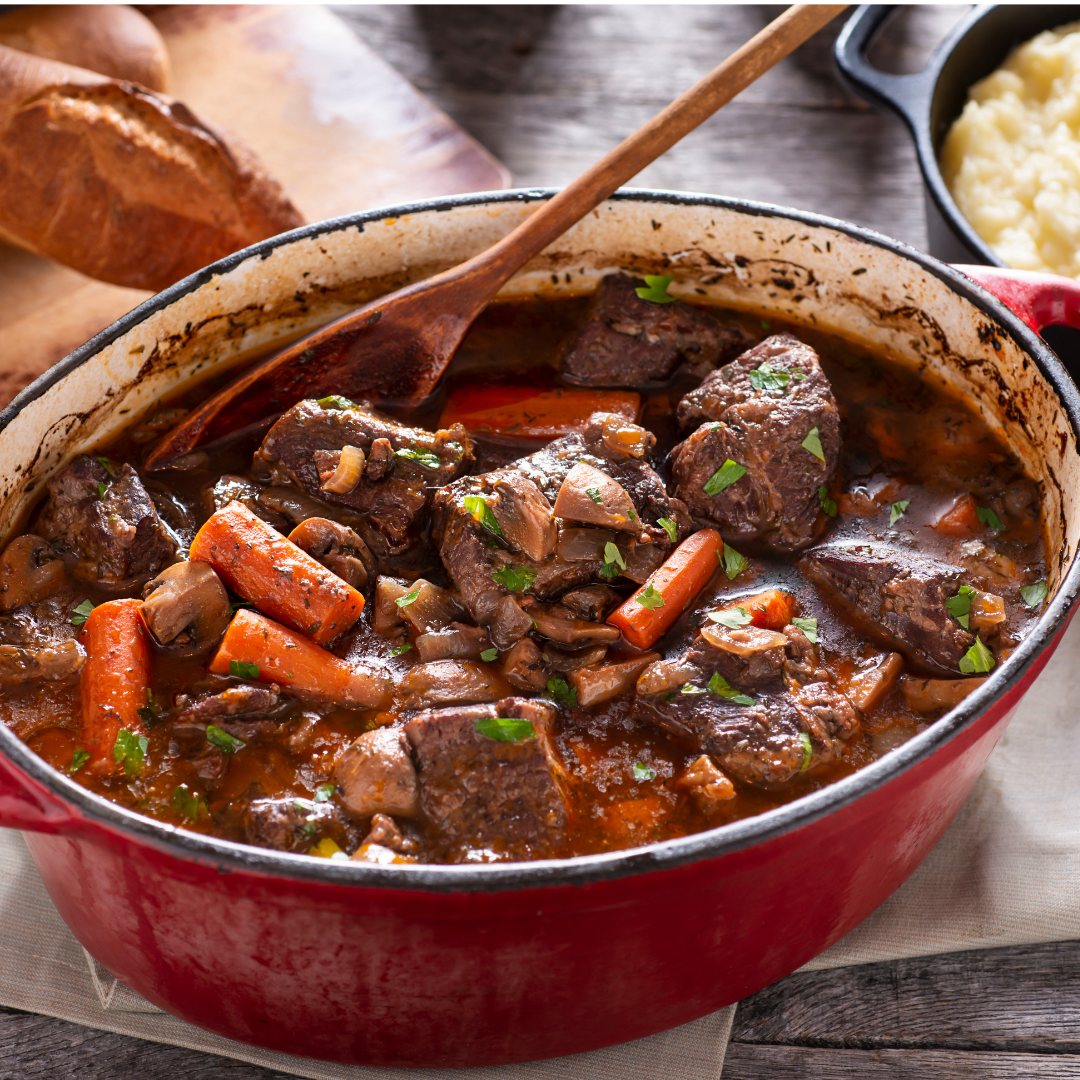
Stewing
Stewing is similar to braising, except the meat is completely covered in liquid. Stew meat in a stockpot or Dutch oven on the stovetop or in the oven, or in a slow-cooker.
Stewing Basics
- Cut & dredge: to ensure even cooking, aim for cubing the meat into approximately 1 inch cubes. Many recipes call for dredging beef in flour before browning.
- Brown the meat: heat some oil in a pan over medium hear and brown the meat on all sides. Drain unless your recipe calls to leave the drippings for additional flavor.
- Mix in ingredients: following your recipe, add seasonings, vegetables, and liquid, such as broth, wine, beer, juice, or water. Bring the liquid to a boil, then reduce heat to low and cover with a lid.
- Simmer & stew: follow your recipe for timing. Don't remove the lid unless your recipe calls for adding other ingredients later on. Check for when the meat is fork tender.
-
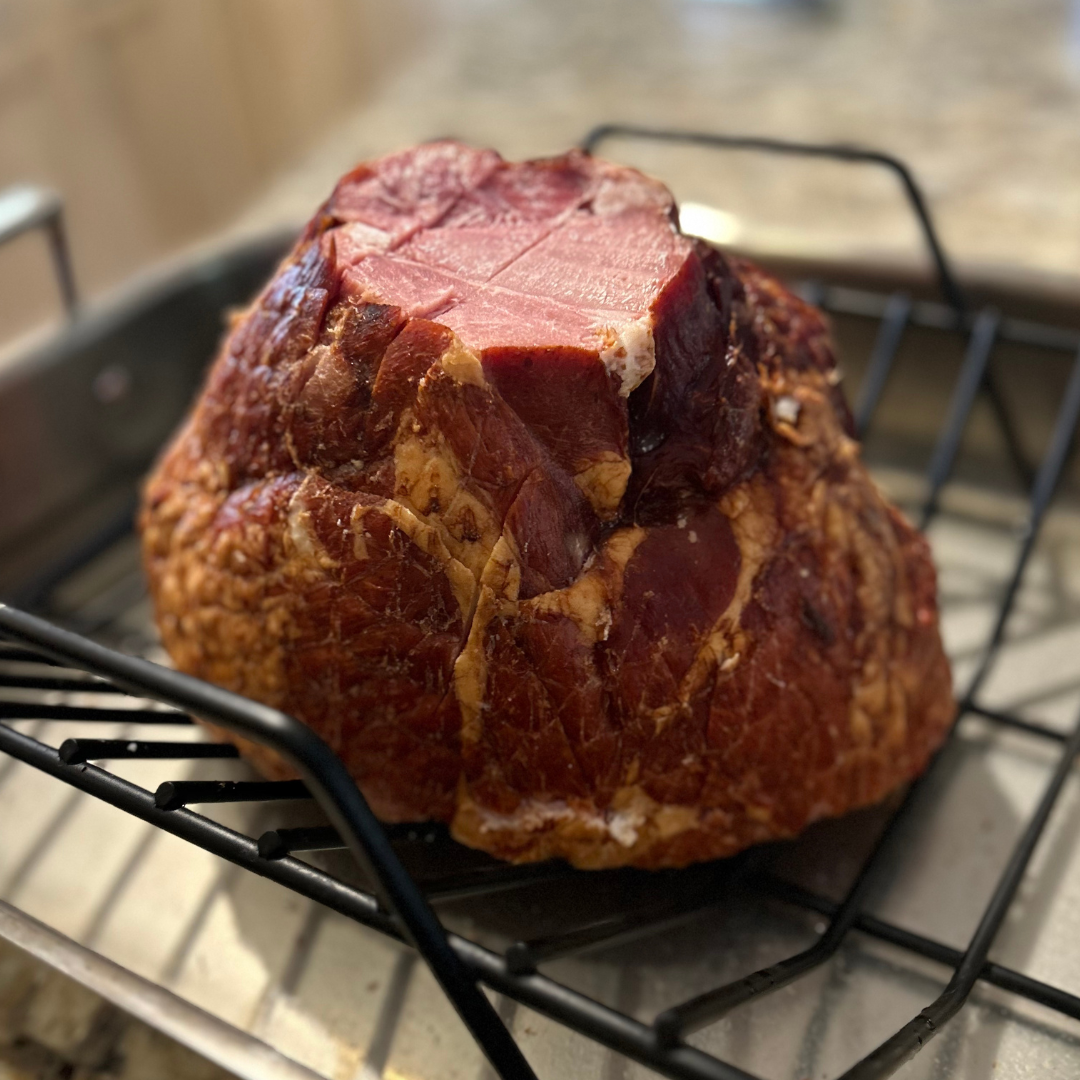
Oven Roasting
Oven roasting generally uses a lower temperature over a longer period of time. Simple to manage and multi-task, oven roasting is ideal for cooking large roasts and tougher cuts.
Roasting Basics
- Preheat and prep: set your oven to the correct temperature and season your roast according to the recipe.
- Roast the meat: place roast fat-side-up on a rack in a shallow roasting pan. We recommend an ovenproof digital thermometer to avoid opening the oven unnecessarily and also to prevent juices from escaping from multiple holes in the roast. Cook as recommended and pull the roast a few degrees below your target temperature because it will continue to rise after you remove from the oven.
- Rest the meat: cover the roast loosely with aluminum foil and let it rest awhile. Larger roasts may need up to 15-20 minutes.
- Carve & serve: use a sharp knife to properly carve the roast. Always cut across the grain for maximum tenderness.


Try our Latest Recipes
View all-
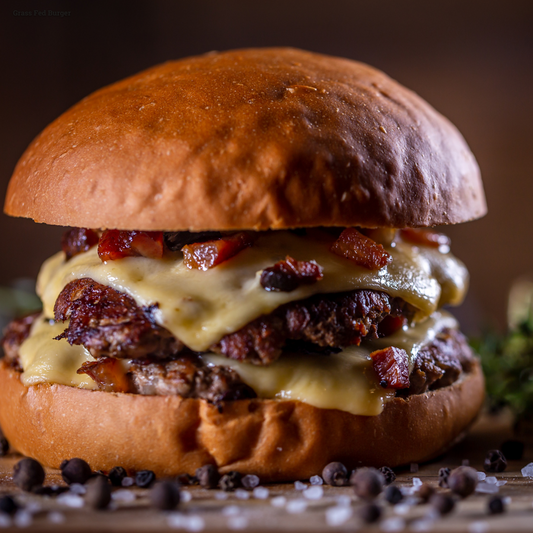
Grass-Fed Burgers
Blackberry Ridge FarmsThere's nothing better than a delicious burger on a summer day. So whether you're looking for an easy way to make grass fed burgers for your next tailgate, barbecue, party,...
Grass-Fed Burgers
Blackberry Ridge FarmsThere's nothing better than a delicious burger on a summer day. So whether you're looking for an easy way to make grass fed burgers for your next tailgate, barbecue, party,...
-
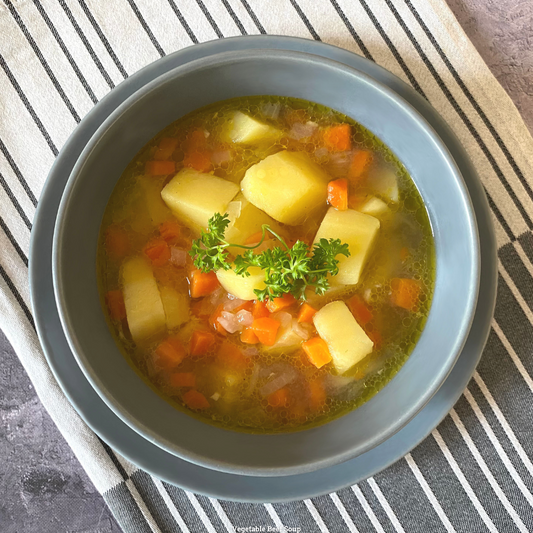
Vegetable Beef Soup
Blackberry Ridge FarmsIf you're looking for a hearty way to end your day, try this delicious vegetable beef soup from Blackberry Ridge Farms! Using homemade beef bone broth elevates this recipe to...
Vegetable Beef Soup
Blackberry Ridge FarmsIf you're looking for a hearty way to end your day, try this delicious vegetable beef soup from Blackberry Ridge Farms! Using homemade beef bone broth elevates this recipe to...
-
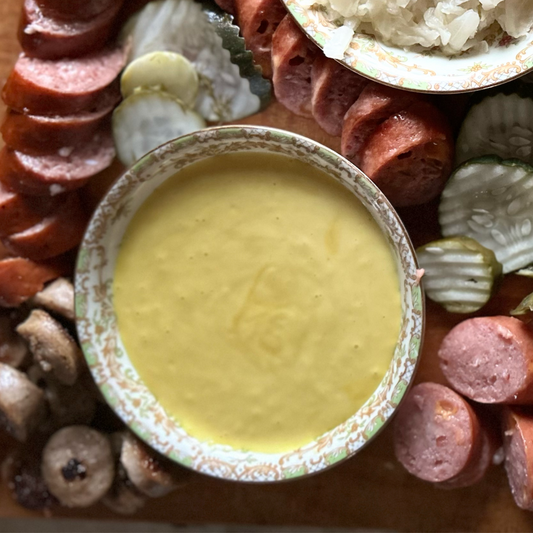
Honey Mustard
Fertile Acreage FarmWhether you're looking for sweet or tangy mustard, this recipe is quick and easy! Try it with brats, hot dogs, and more!
Honey Mustard
Fertile Acreage FarmWhether you're looking for sweet or tangy mustard, this recipe is quick and easy! Try it with brats, hot dogs, and more!


